The Taming of the Spew
February 19th, 2012
(or, Cube's Labours Lost)
Lun3DM5 is done, but the part of the project I spent the most time on hasn't been seen yet: the procedural cube-spewer that generated 90% of the map's brushes. Once I learned the joy of writing quick, flexible tools in languages like MEL and python, I began to find more and more ways to make my life easier with it. I freed up a lot of room to iterate on Q4CTF7 by automating the team-based texture, skin, and light color swapping in the mirrored half of the map with python. Talisman wouldn't have gotten nearly as far as it did if I hadn't stepped up to meet the tech guy halfway by evolving the pre-export cleanup steps into an entire MEL-based pipeline. At Lightbox, contributing to the toolset and working smarter rather than harder is a way of life. Once the possibilities became a part of my working vocabulary, it was difficult to have ideas that didn't ask for languages like python to play a role in their development, which was part of where the visual concept for Lun3DM5 came from.

What I needed based on the look I had in mind was a simple way of starting with rough brushwork, subdividing it, and then offsetting the subdivided brushes in a way that roughened up the surface but still adhered to the original hull. I'd need control over parameters like frequency of divisions, I'd need to be able to differentiate between flat walkable floors and fractured walls and ceilings, and most importantly I'd need to avoid any constraints on the design of the map itself.
Recursive options I discounted early. Progressively subdividing every surface into smaller and smaller subrects would be efficient, but too visually revealing of itself. The divisions made in the first recursions would be visible as long unbroken lines, while the patterns I envisioned as most interesting were as jumbled as possible, with no one line extending too far before being broken by a perpendicular. The most direct way to automate that was to brute-force fill a rectangular surface with smaller rects of random size until all available area was used up, with no algorithmic relationship between rects which might manifest itself visually. The first tests involved sweeping four diagonals from the corners of a rectangle toward the center, laying down random subrects and then overlap testing them as they went.
Now, python can be very efficient with large data sets, but it does require you to do things in "the pythonic way," which involves expressing your code in ways that maximizes use of functionality implemented within python's c runtime, which is naturally much faster than the same wheel reinvented in the python interpreter. Every new subrect would have to be checked against all previous existing rects, and as the diagonals closed in on the center that would make for a lot of testing. Bounds-overlap testing is of course cheap in c, but python, being interpreted and loosely typed, incurs a little overhead every time it retrieves an object from its symbol table. An n² torrent of combinatorial "if x > y"s would be asking for trouble.
I decided to take advantage of python's set{} type instead. Sets are unordered and unique arrays, good for membership testing and quickly manipulable through through built-in union and intersection methods. Since all brushwork had to be on the grid, I could essentially treat a list of any coordinates within a subrect as a set, and compare overlaps by simply intersecting two sets and seeing if I wound up with an empty set or not. By initially scaling all the starting shapes down and working at 1/8th scale, I locked my minimum cube interval to 8 units and also reduced the size of the volume sets by 64x. This proved delightfully fast.
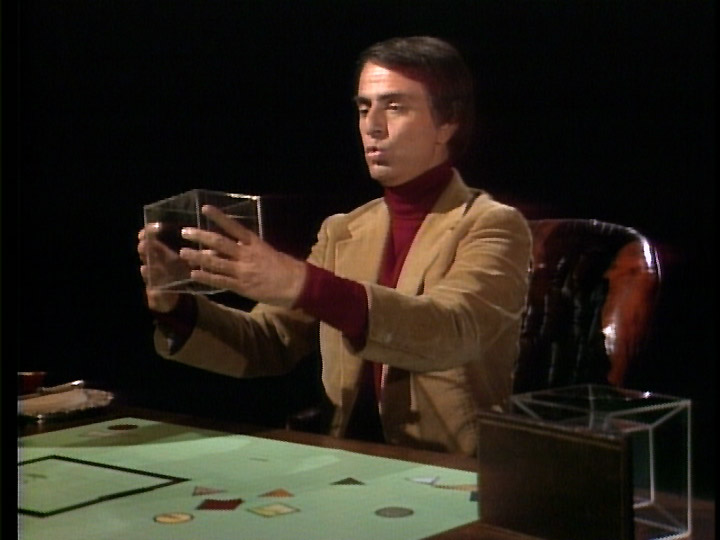
The trouble arose at the edges. A map is not made up of flat rectangles in isolation, but planes of every shape that meet at every angle. Every plane-subdivider was going to have to pay attention to how it intersected all the other planes, so that two planes that met at an edge all ended in subrects that lined up with each other, so that they could become ordinary brushes visible on two sides. It was making for a whole lot of objects that had to know a lot about other objects, and the challenge was looking prohibitively hairy until I had a Carl Sagan-inspired insight: I had the method already worked out, it simply had to operate on three dimensions instead of two.
Instead of sweeping diagonals across a rectangle from four corners, I'd sweep them across a rectangular volume from eight corners. I'd fill the entire volume with interlocking brushes, true, but I could easily throw away every one that wasn't visible from the outside, then randomly offset the outward-facing brushplanes to get my fully randomized look.
The process began with a blockout map that represented what I wanted to be the final collision hull. Keeping those as clip brushes, I built a caulk hull that was recessed 16 units from every surface (except walkable floors). That was sliced into chunks in increasingly inconvenient places that I could import into Maya and process one by one, since doing the whole map at once was time and memory prohibitive.
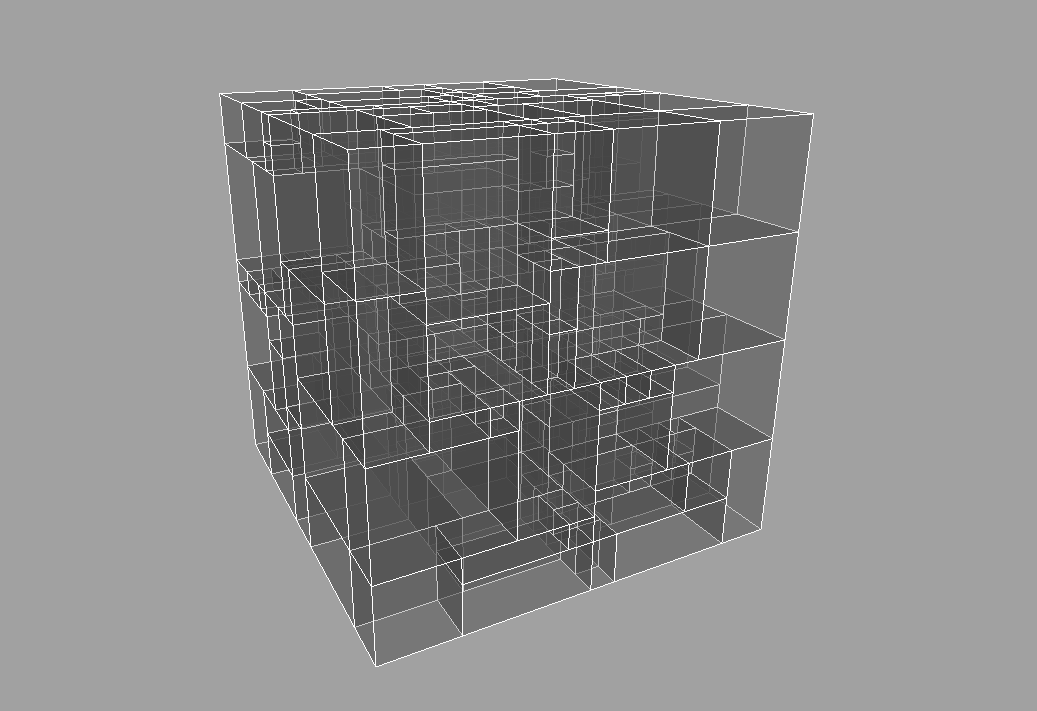
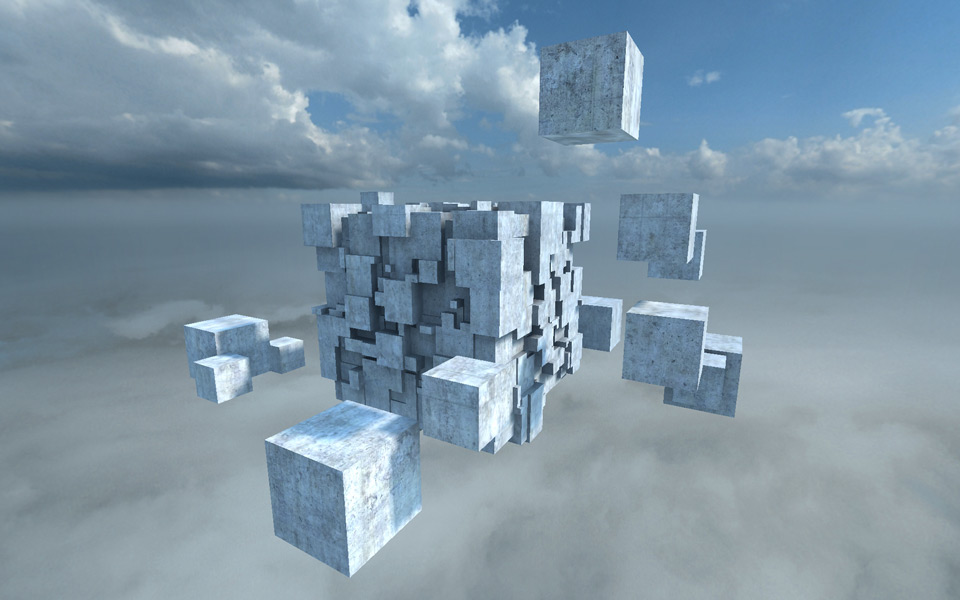
The algorithm itself, once doing the 1/8th scale (1/16th in cases of inaccessible areas like the underside that don't need as much detail), would expand the solid caulk volume by 1 unit in every direction, then do the 8 corner sweep to fill the volume with smaller interlocking blocks. A new block created entirely within the caulk would be skipped, and one created poking out of the caulk only on one side would be clipped so it was flush. Everything was then scaled back up and all the planes that face out of the caulk volume would be offset randomly by between 8 and -8 units. This would keep the fractured surface entirely inside the 16 unit thick collision envelope, but not recessed so deeply as to appear to create a cavity that a player could expect to fit into.
I'd make a simple cube in Maya out of each block the script would generate, scoping them out for any geometry I wasn't fond of. I'd manually clean up any areas where all the blocks were the same size (they'd repeat the same area of the texture map) or lined up along a straight continuous border. More often than I liked, two large blocks would leave 8 units of space between them, which would fill with a river of tiny cubes; I worked around this by adding a chance that a block's random size would be snapped to a 2 or a 4, sassing magic numbers like min and max random cube size and the distribution in between, and if all that failed, spot-fixing by hand or just trying my luck re-generating the whole chunk again.
I actually used the script by sourcing it in the script editor in Maya, then literally entering commands and method names and parameters manually. There's older code still in there that probably doesn't work and was written for older iterations of the script that worked differently, that I simply didn't need to clean out. I'm releasing the script for anyone who wants to explore it out of curiosity, modify it, or learn something about python by example. It's not a fully-formed bug-free tool with a nice UI that can cubespew any map in the world.
Download cubespew.py - 38kb
Light Dome
The mechanism for generating suns from a skybox was simpler and more reliable, but still equally guts-everywhere.
The full, rather rough process:
- Map the six images of the skybox onto a volleyball (a spherized cube). Six materials, one per square panel, would have sufficed, but I opted to combine them into one image in photoshop and then map the UVs accordingly. I, uh, don't recall why.
- Make a soccer ball (a fullerene) with an extra vertex poked into the center of each hexagon and pentagon. This makes for a geodesic sphere with 122 almost-evenly spaced verts. If there are any features in the skybox I want to make sure are centered on a point of light (like the sun) I'd rotate the sphere to line one up.
- Use Transfer Maps to bake the skybox onto a second texture map fitted to the fullerene. This is the easiest way to get the skybox onto the fullerene, since there aren't square borders on a soccerball that would match the original six cubemap sides.
- After processing the soccerball skymap in photoshop however I felt necessary (adjusing contrast, sharpening, saturating or desaturating, etc) I'd bake the texture map into the soccerball's vertex color.
- One function in python finds the vertex color and normalizes it, then takes its position relative to the origin and decides the heading and inclination in q3map_sunExt terms.
- Each vert is the same brightness, so there's nothing HDRI about it in the default state, but I'd run it a couple of times on different sets of vertices with a different intensity parameter, then compile the list of suns after. On Lun3DM5, for example, the one vert centered on the sun was about 20 times brighter, and the suns coming from underneath about twice as bright, as the rest of the normal ones.
- Compile a map with the lights, assess, tweak and repeat.
I've included a sample scene with textures and geometry as well as the text of the script.
Download makeskylights.zip - 687kb